Toon Shading in Blender
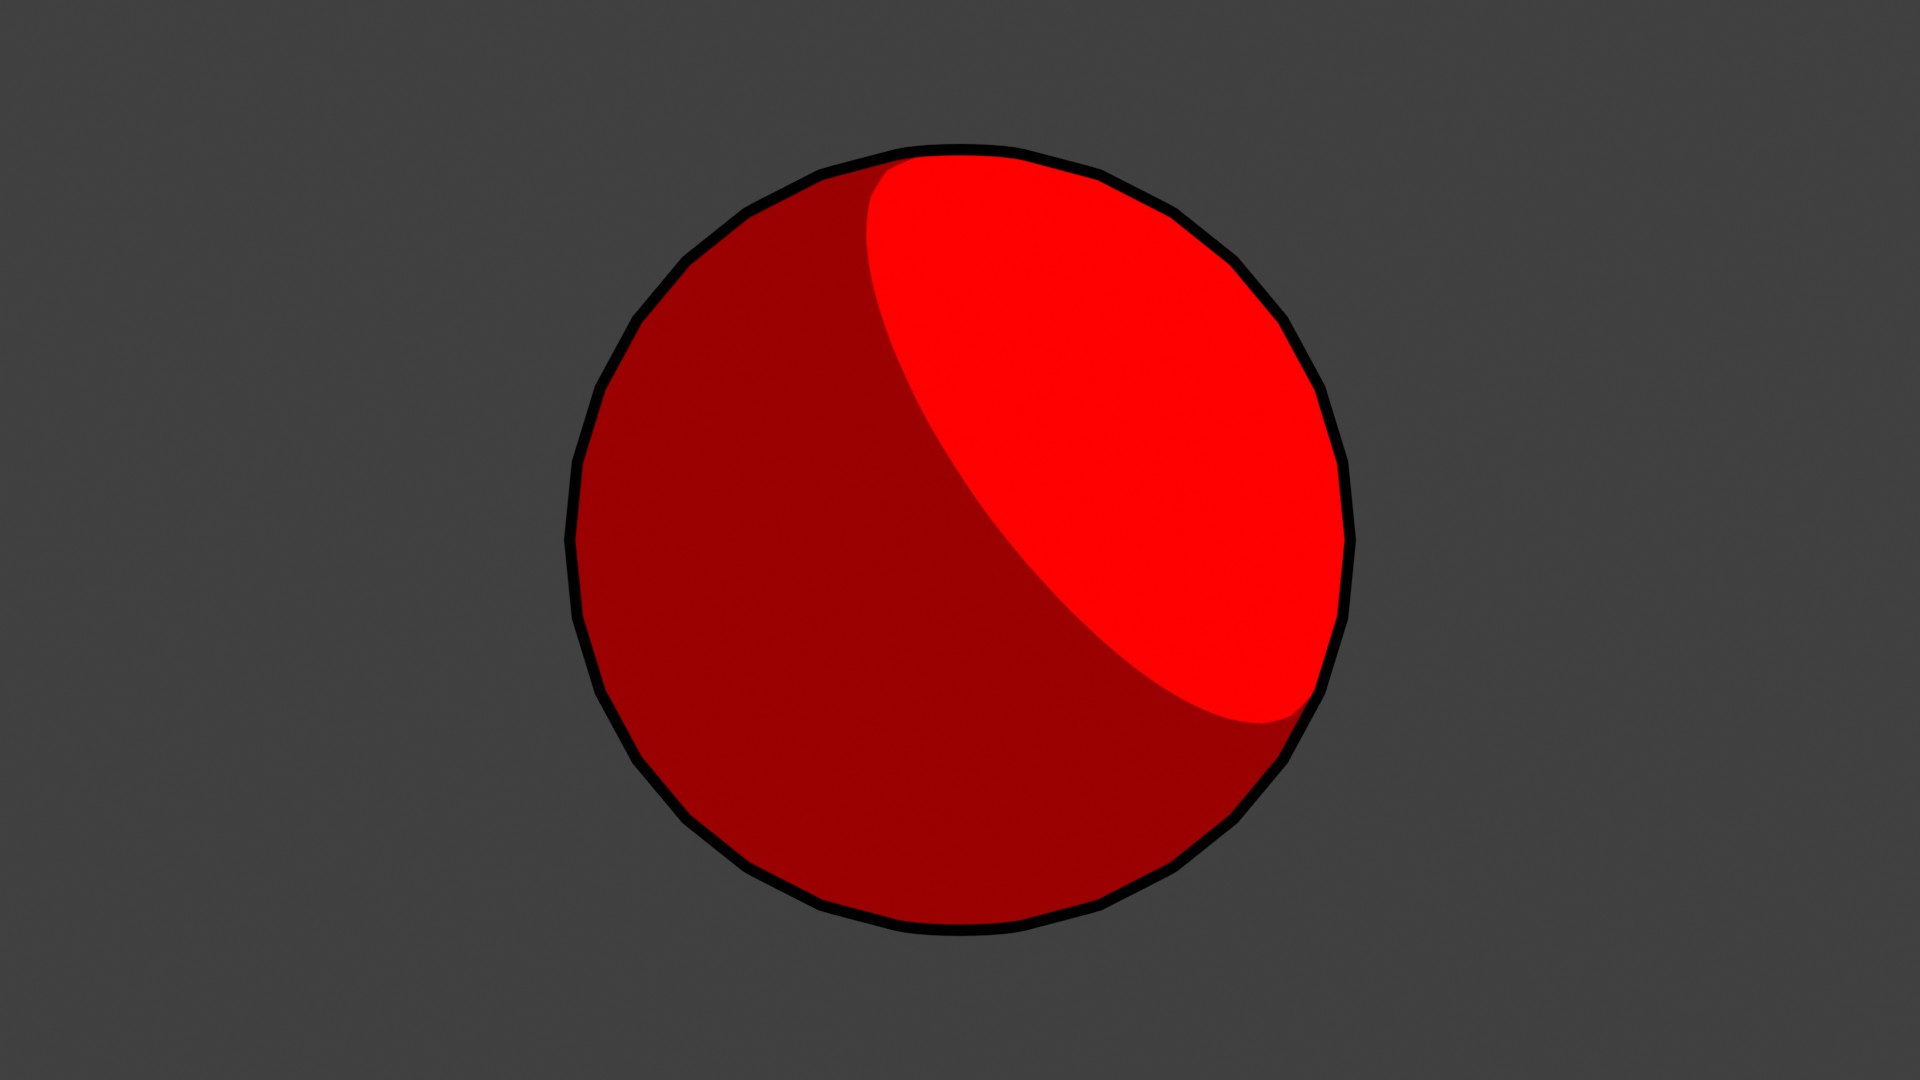
I've discovered a toon shading style that I really like in Blender. Here's what it looks like and in this post we'll briefly walk through how to reproduce the style. Note: This post assumes basic knowledge of Blender concepts and how to navigate the interface.
Before we get started, let's remove the default cube from our scene and add a UV Sphere and shade it smooth so we can get an idea of how our materials appear in the light. Since spheres are often used in traditional art classes to visualize and practice shading in light, I think it's a great geometry to use for this.

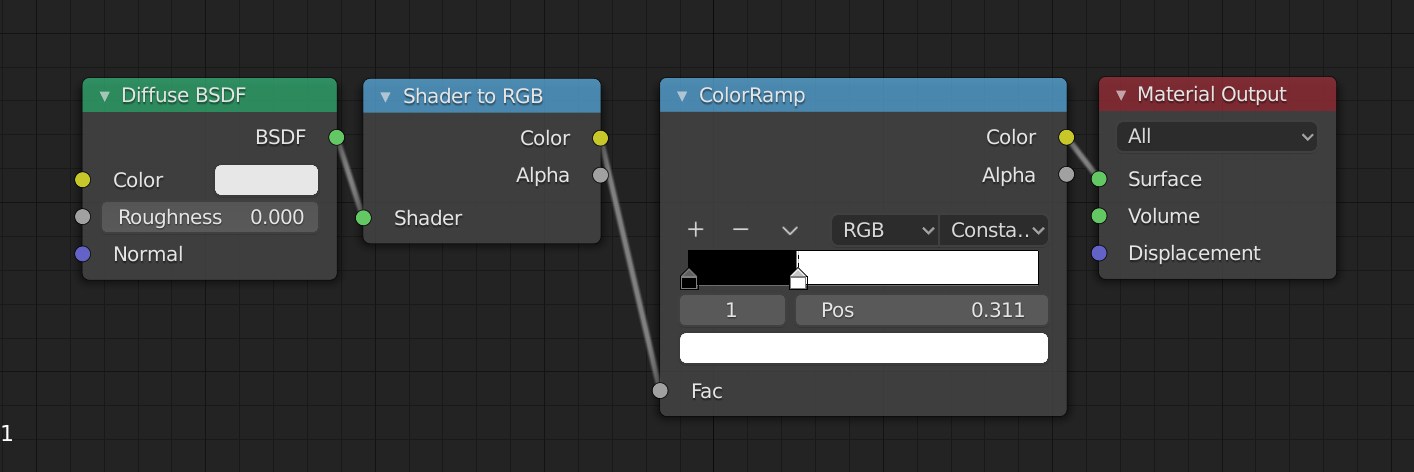
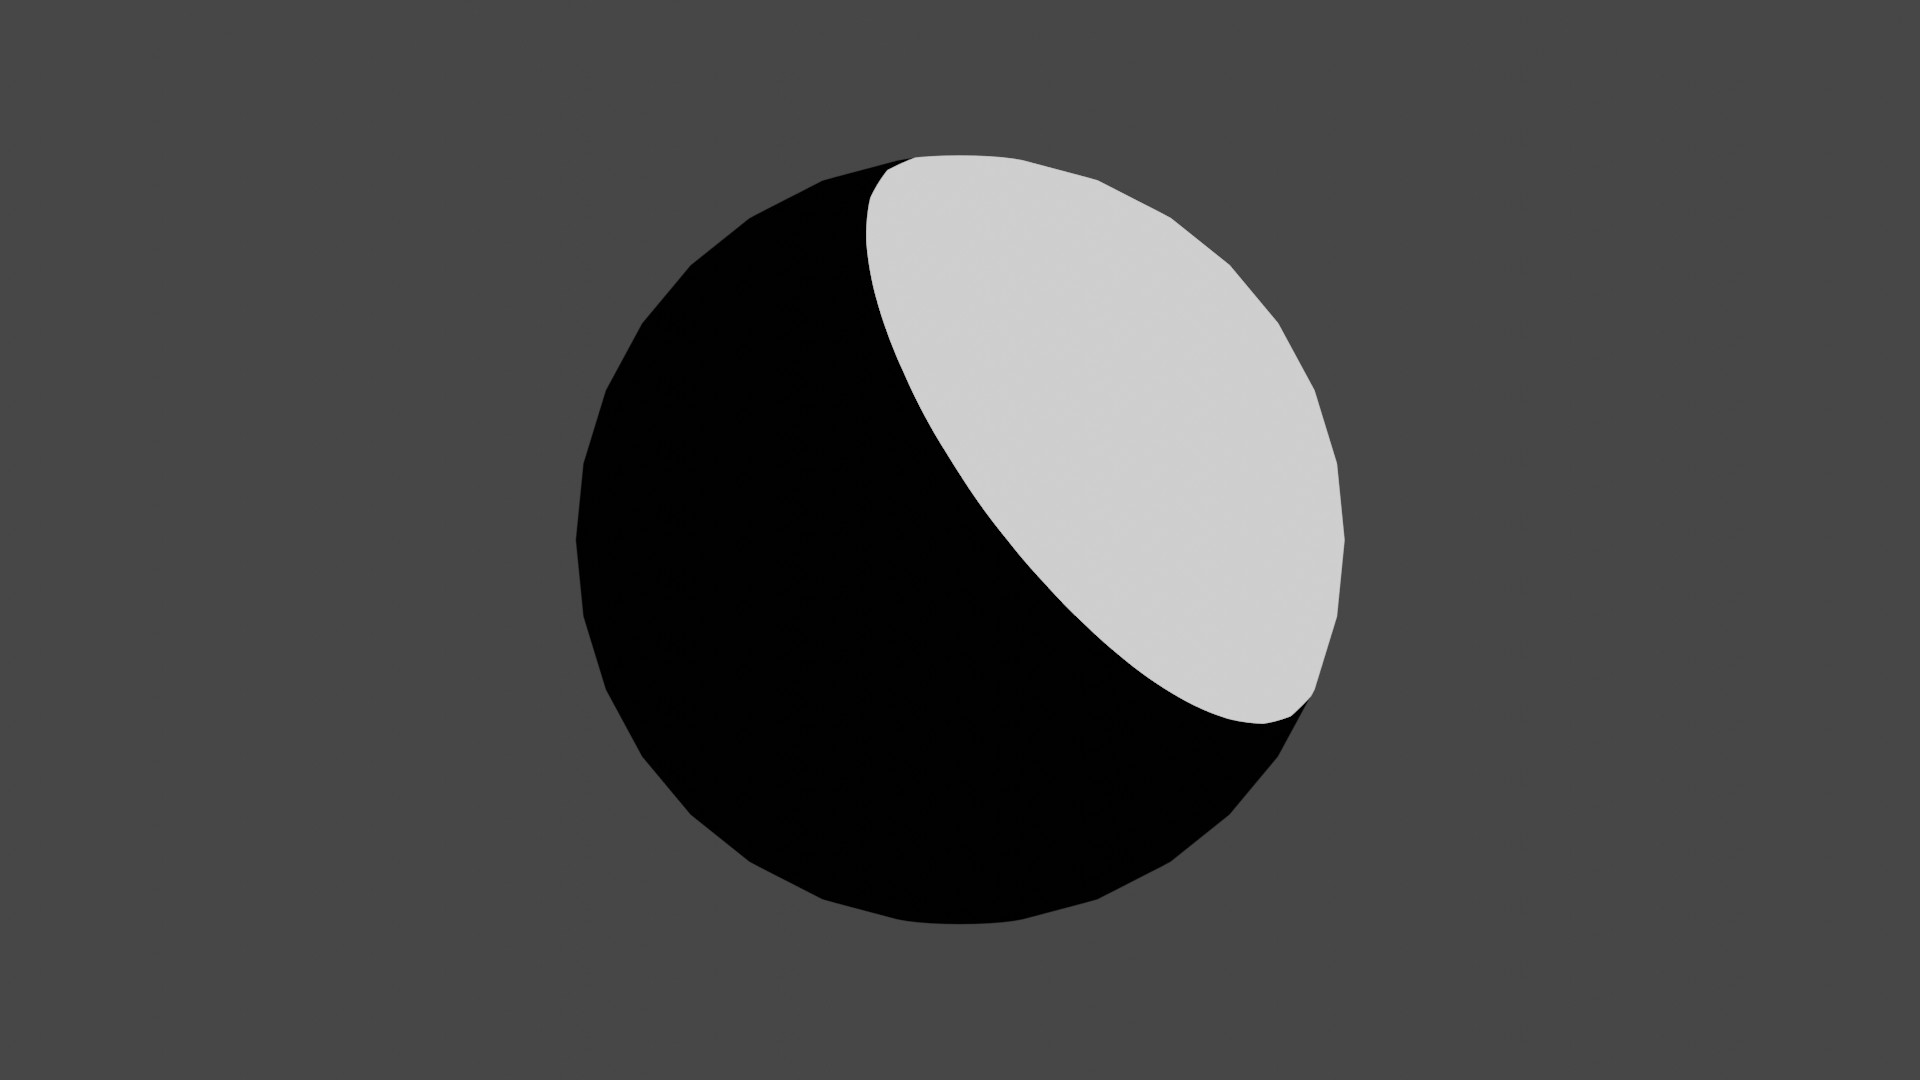
Next we need to add our toon shader. To do this, go to the shading tab and create a new material. Then, set up your nodes to look like this. This is the core of the toon shader appearance. Notice that the rightmost dropdown in the ColorRamp node is set to Constant. By default it's set to Linear so you have to change it.
But, it's a bit tricky to understand how this shader is actually toony. To help see our impact, let's give our material some color. Below you can see that I changed the white into bright red and the black into a slightly darker red. This way, the it looks like our light is casting a shadow.

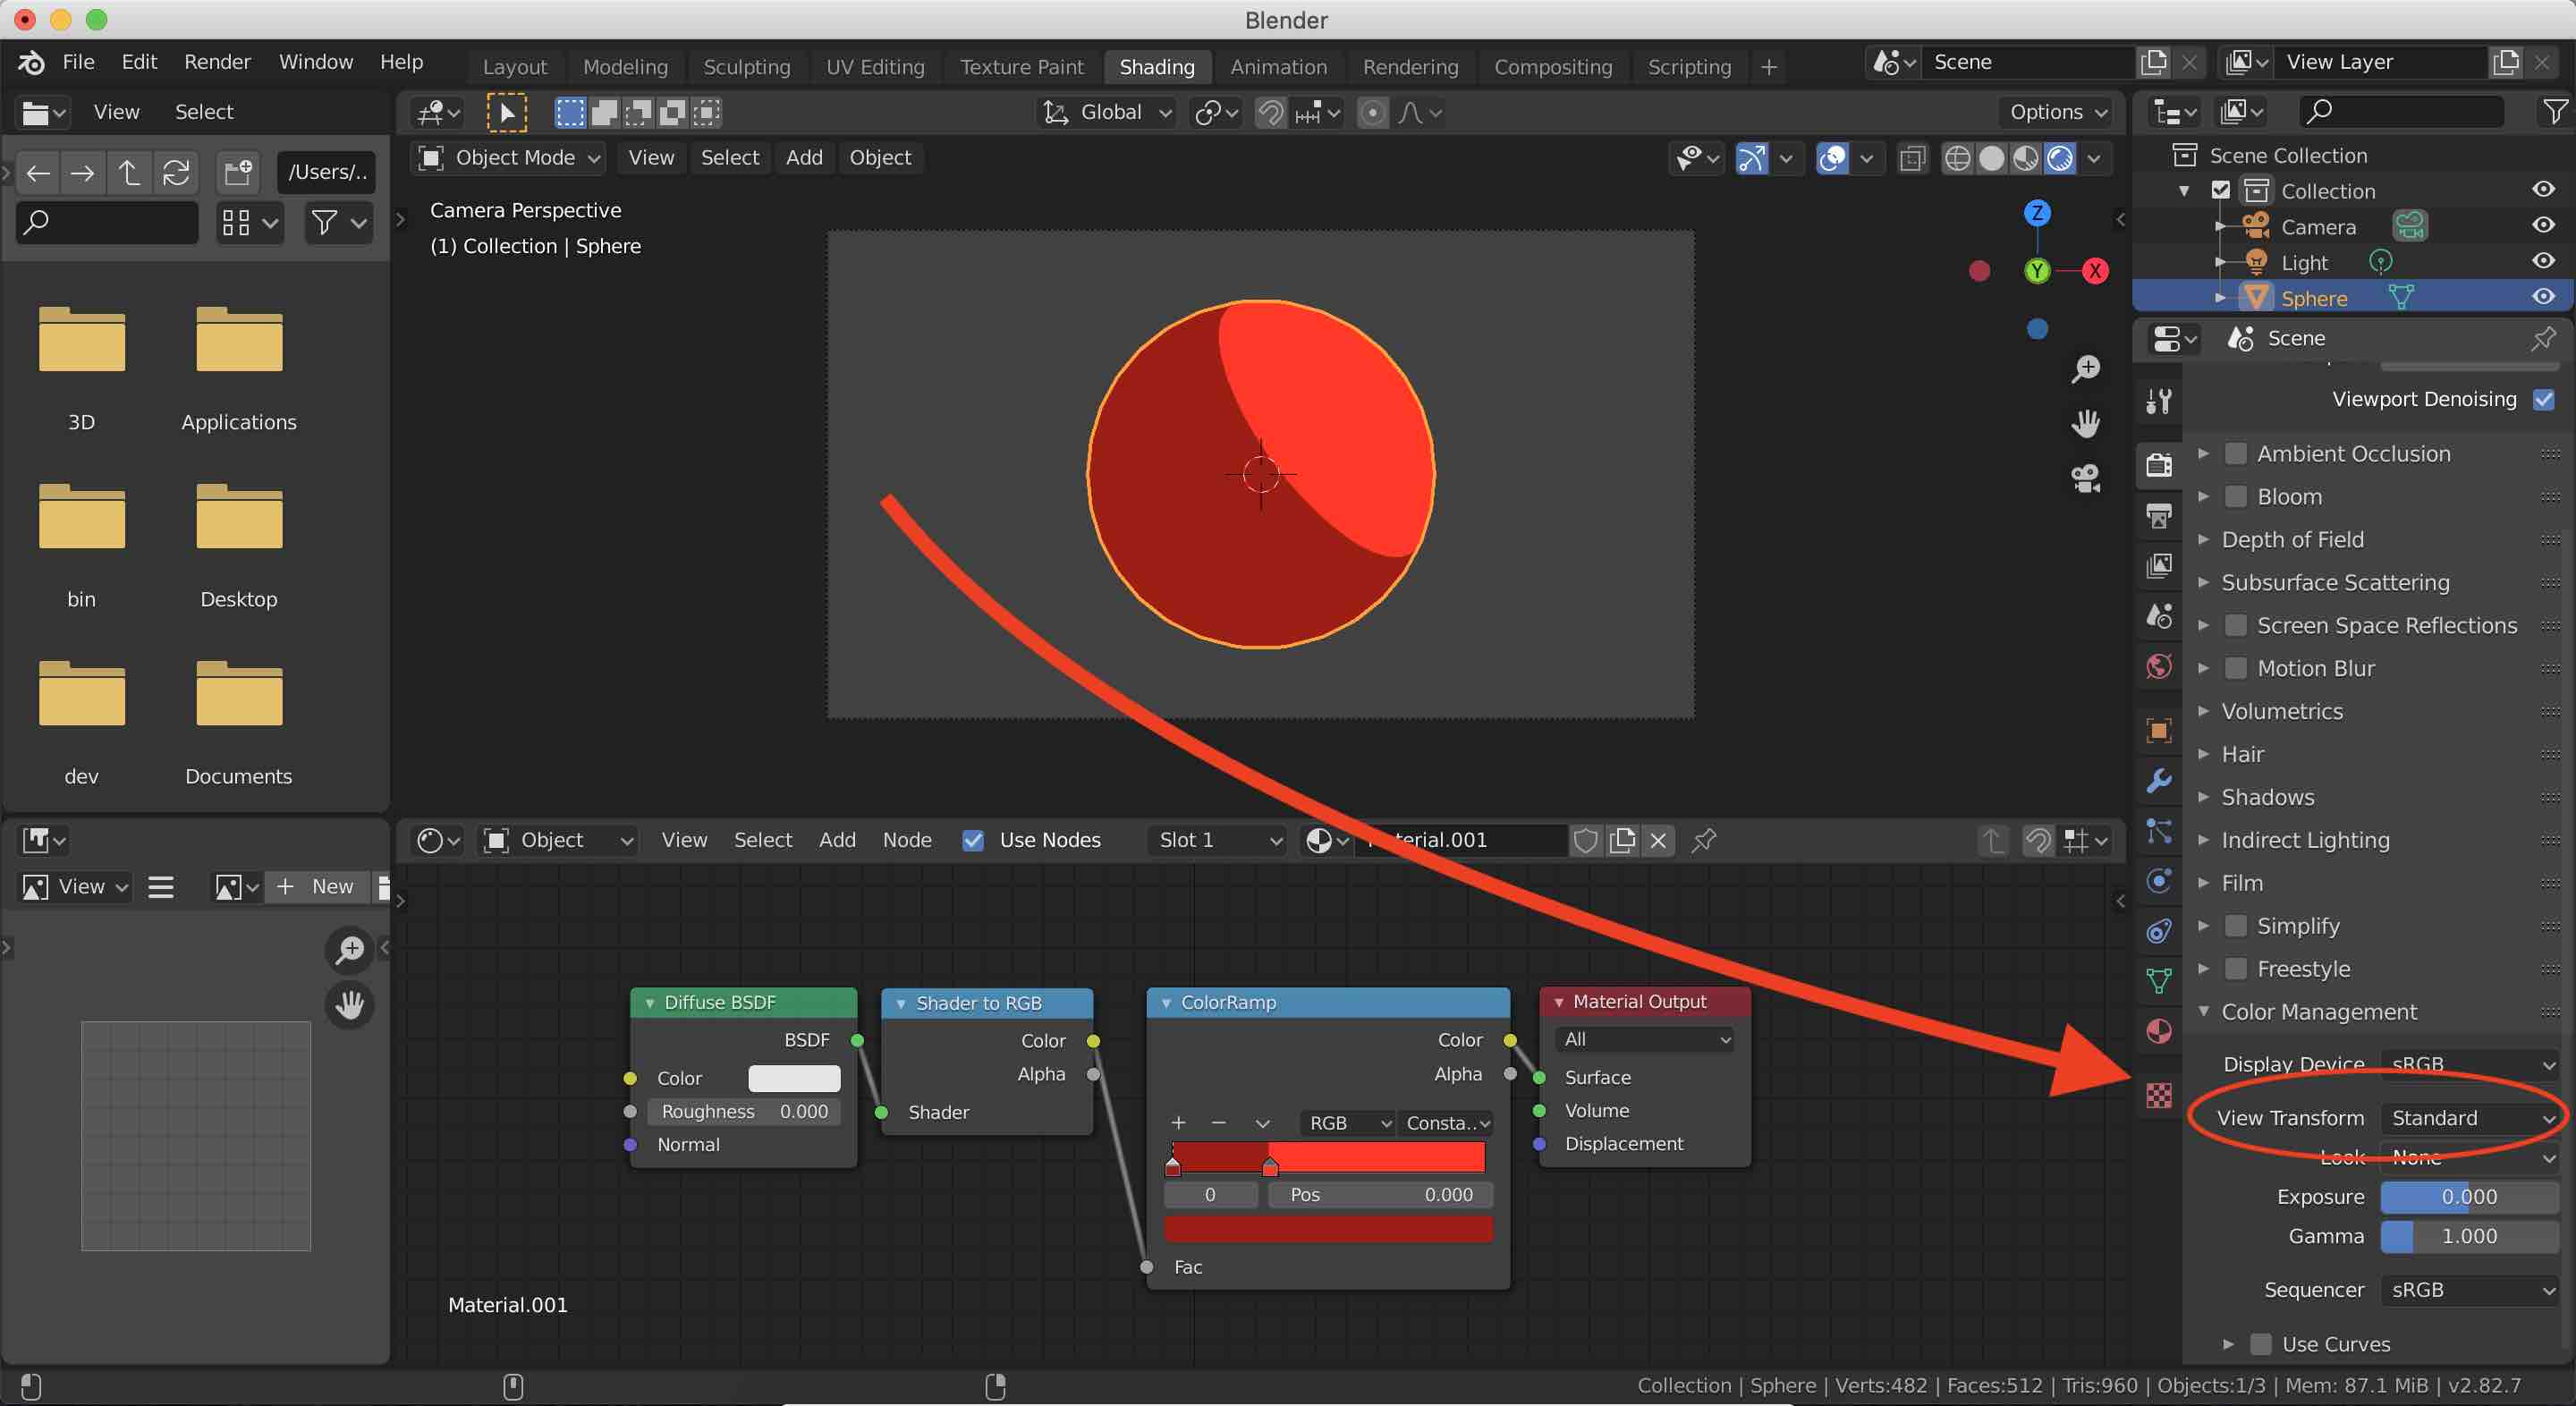
Although our sphere is pretty much complete, the colors look a bit duller than we defined. That's because of how Blender renders colors by default. We want it to ignore most of the raytracing that Eevee and Cycles do, so in order to get that true, vibrant colors that we want we need to change the View Transform from Filmic to Standard.
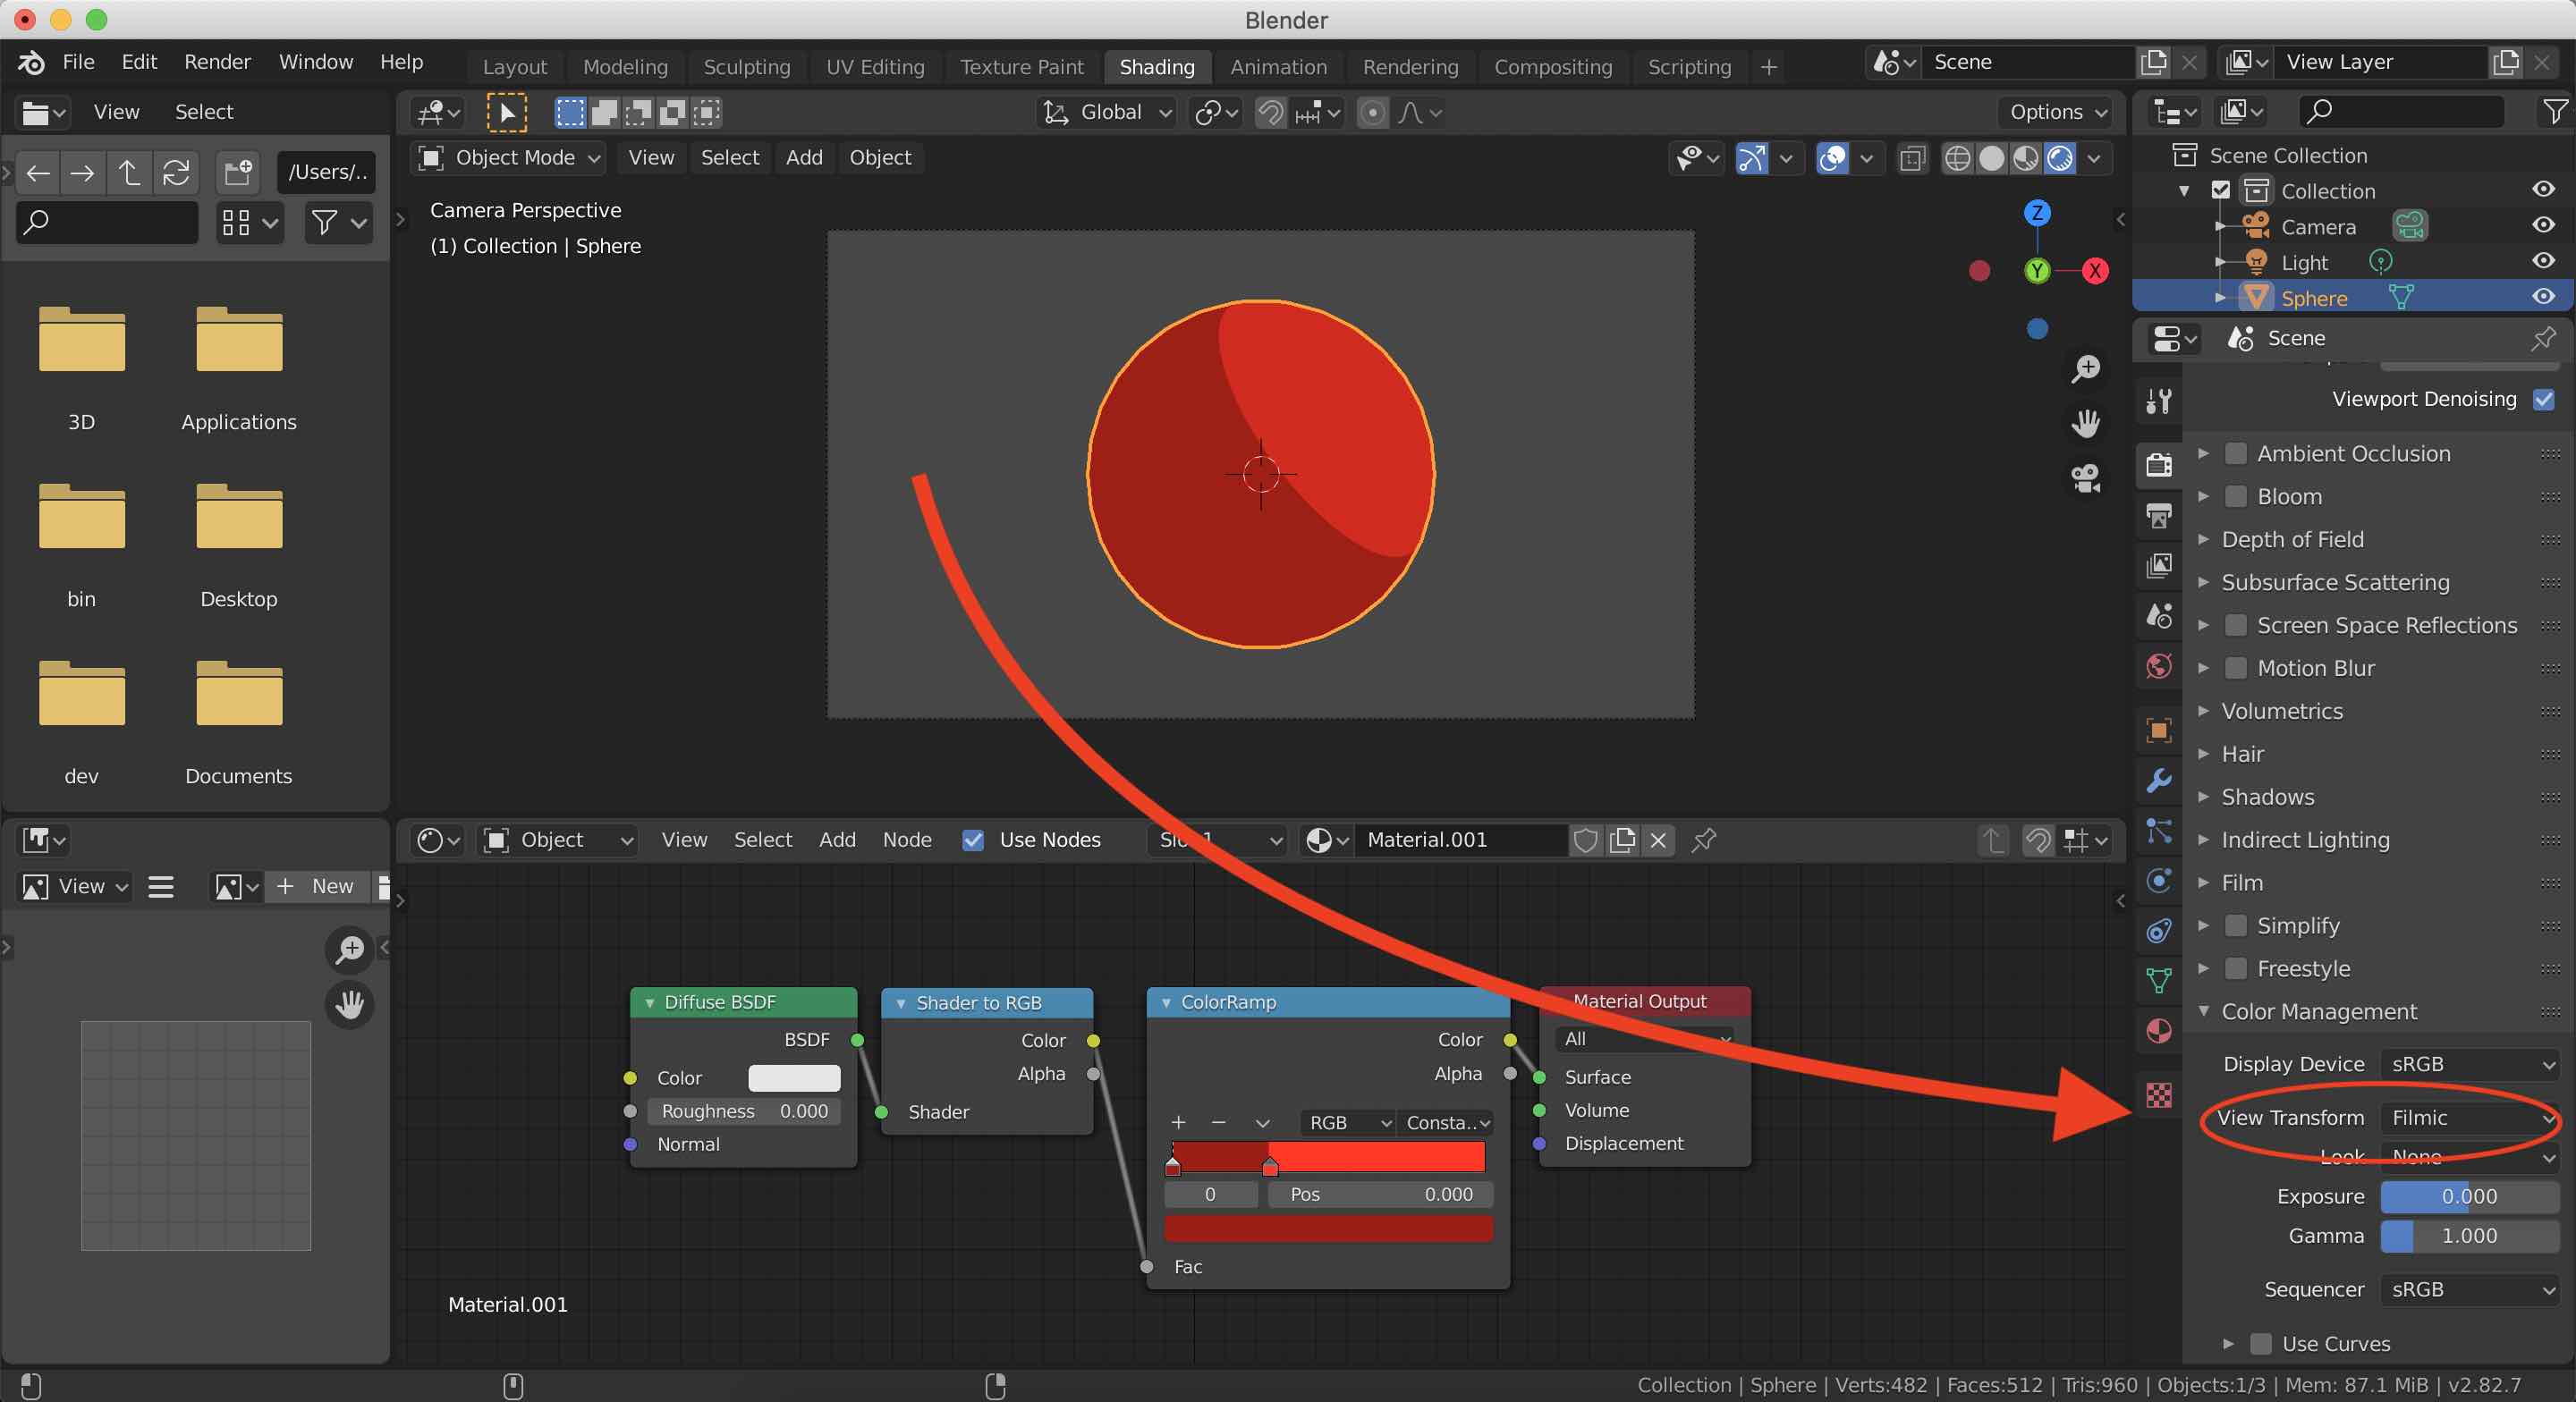
That brightened the colors in our scene and gave our sphere a much more familiar, toony look. And that's it! We've created a shader material that gives meshes a toon look.
You also may have noticed that the sphere I had in the first image in this post has a black outline. I added that, because it's a detail that I like. It reminds me of some of my favorite 2D animation styles. If you'd like to add colored outlines to your meshes, this YouTube video walks you through it.
I hope this helped. Happy creating!